



I have a passion for capturing the beauty of flowers through photography. It’s a wonderful genre that offers accessibility since you can find flowers almost anywhere. Moreover, it allows you to explore various styles, including abstracts, close-ups, panoramic scenes, and more.
However, achieving exceptional flower photography goes beyond merely finding an attractive flower and clicking the shutter button. It involves working with the right lighting, composing your shots effectively, selecting the appropriate camera settings, and post-processing your images, all in pursuit of that perfect final shot.
Luckily, I’ve been in your shoes, and in this article, I’m excited to share all the valuable tips and tricks I’ve gathered, covering topics such as:
- Finding the perfect lighting conditions for flower photography.
- Selecting the optimal aperture setting to achieve your desired effects.
- A simple technique to create a stunning soft-focus effect.
- My secret for creating captivating foregrounds.
- And much more!
So, if you’re eager to capture breathtaking flower photographs, let’s delve right into it!
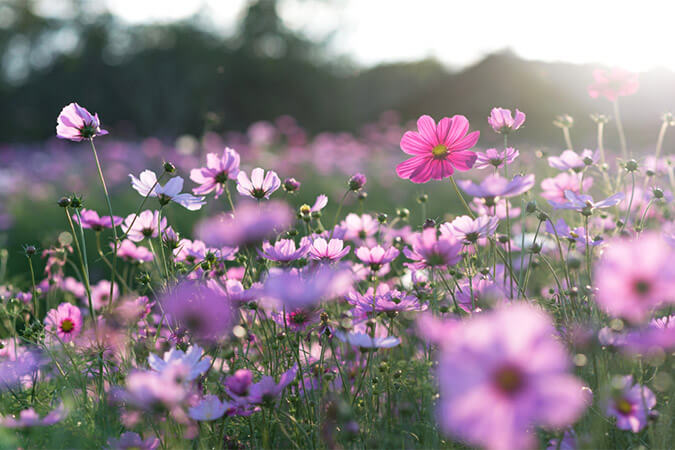
The perfect flower images gear
As for the ideal gear for flower photography, it doesn’t have to be extravagant. Beginners can start with a smartphone or a point-and-shoot camera without any issues. However, as you progress and want to enhance your photographic capabilities, consider the following equipment:
Interchangeable Lens Camera
Upgrading to an interchangeable lens camera opens up a world of possibilities. It allows you to experiment with various lenses, each offering a unique perspective. You can use one lens for wide shots of flower fields and then switch to another for detailed close-ups. Look for cameras with larger sensors (full-frame is ideal but not necessary), higher megapixel counts (important for large prints), in-body image stabilization, a fully articulating screen, and a high-quality viewfinder. Mirrorless cameras, in particular, offer the advantage of a digital viewfinder, which can be invaluable for setting your exposure. However, DSLRs are still a great choice.
Macro Lens
To capture the intricate details of flowers, a dedicated macro lens is essential. Aim for a macro lens that provides 1:1 magnification, allowing you to capture subjects at life-size on your camera’s sensor. Fortunately, many affordable macro lenses from third-party manufacturers like Tamron, Sigma, and Tokina offer exceptional sharpness. Opt for a lens with a focal length in the 80-120mm range. This range allows you to photograph up close without needing to be millimeters away from your subject while remaining relatively compact and cost-effective compared to longer macro lenses.
Tripod
Whether or not to use a tripod depends on your shooting style and preferences. Some flower photographers swear by tripods, while others prefer handheld shooting. Your choice should align with your approach to flower photography and photography in general. Tripods are beneficial if you prefer a slower, more deliberate workflow. They also help maintain focus throughout the entire flower when shooting at high magnifications, ensuring everything remains sharp. However, if you prefer a faster, more flexible approach and intentionally desire a softer focus effect with only a portion of the flower in sharp focus, handheld shooting may be the way to go.
The perfect flower images settings
For the best flower photography settings, achieving precise control over your exposure settings is essential. I recommend working in Manual mode, where you can independently set your aperture, ISO, and shutter speed. If you’re not entirely comfortable with Manual mode, Aperture Priority mode can be a suitable alternative.
Begin by setting your ISO to its base value to preserve the highest image quality. Next, choose the aperture that best suits your desired depth of field effect. Wider apertures (smaller f-numbers) create a narrower window of focus, while narrower apertures (larger f-numbers) provide a wider window of focus. Whether you prefer a soft-focus effect with artistic blur (typically achieved with apertures in the f/2.8 to f/5.6 range) or a sharp focus effect where the entire subject is crisp (typically accomplished with f/8 to f/16), the choice is yours. Don’t hesitate to experiment and discover what appeals to you.
Dial in the appropriate shutter speed to achieve the correct exposure. Ensure it’s fast enough to capture a sharp final image, especially when working at high magnifications. Generally, you’ll want a shutter speed of at least 1/160s, but in some cases, 1/100s or faster may suffice.
If the shutter speed falls short, adjust it accordingly, and then compensate for the reduced exposure by modifying the aperture or ISO settings.
Here’s one more valuable tip: when shooting at high magnifications, switch your lens to manual focus. While it may seem unconventional at first, manual focus enables precise control over your point of focus, and you’ll quickly become proficient at it.
1. Capture Flowers in Ideal Lighting
Did you know that overcast skies create perfect conditions for flower photography? It’s true. The soft, diffused light of an overcast day enhances the delicate beauty of flower petals. With no harsh shadows or bright spots, you can achieve a balanced and even exposure. When planning a flower photoshoot, it’s advisable to check the weather and aim for a cloudy day. However, be cautious during early morning and late evening on overcast days, as light levels may decrease, leading to unwanted blurriness, especially when shooting at high magnifications. Therefore, it’s best to photograph during midday when the sky remains bright but not overly harsh.
While cloudy weather is favorable, it’s not the only time to capture stunning flower photos. Clear skies during the golden hour – when the sun is low on the horizon – can also yield fantastic results. The warm, soft light produced during this time beautifully illuminates your subjects. However, you must be careful to avoid overexposure, given the combination of intense light and colorful petals. On sunny days, it’s advisable to avoid midday shooting when the high sun can create unflattering shadows. Whenever possible, opt for softer, more flattering light.
2. Utilize Backlight for a Radiant Effect
The direction of light plays a crucial role in flower photography, particularly during sunrise and sunset. You need to consider whether the light is in front of, behind, or to the side of your subject. Different lighting directions produce various effects, and while frontlighting can capture intricate details, and sidelighting can create dramatic shots, consider experimenting with backlighting.
Backlighting involves positioning the flower between yourself and the sun, resulting in the petals appearing translucent and glowing. This effect is exquisite and can elevate your flower photography portfolio. Aim to shoot late in the day when the sun is close to the horizon, allowing backlight to directly illuminate the flower petals and cast a warm, gentle glow over the entire scene. You might even capture rays of light filtering through foliage for added visual appeal.
3. Highlight Freshness with Raindrops
Immediately after a rain shower, the outdoors takes on a fresh and appealing look, perfect for flower photography. Cloudy skies offer soft, diffuse light that enhances the overall aesthetics of your images. However, what makes this time even more enchanting are the tiny water droplets that cling to the flowers.
These droplets impart a sense of freshness and elevate the visual appeal of the flowers. The reflections and sparkle of water on the petals add a unique dimension to your photographs. It’s a magical time to grab your camera, just as the rain subsides, to capture these natural beauties. The interaction between light and water droplets creates a mesmerizing effect. Some photographers carry a small spray bottle to recreate this raindrop effect even in dry conditions. It’s an optional trick worth exploring.
Getting up close to highlight the details of water droplets on petals can be exhilarating. Experiment with different angles and perspectives to observe how light interacts with the water. You might discover an entirely new way to see and photograph flowers.
4. Beware of Wind
Wind can be your greatest adversary when photographing flowers, as it can sway your subjects in all directions, making focusing difficult and introducing unwanted blur, especially at slow shutter speeds. To avoid this issue, consider two approaches.
Firstly, conduct your flower photography early in the morning when the weather is usually calmer. Some wind is manageable, and you can mitigate its effects by using a piece of cardboard or a reflector to shield the flower from gusts.
If you prefer not to rise early or need to shoot on a windy day, there’s a second option: bring the flowers indoors. You don’t need an elaborate studio setup for beautiful indoor flower photography. Simply place the flowers near a window and set up a solid backdrop behind them. The example image below was captured by taking a flower indoors and positioning it in front of a white sheet:
5. Get Closer for Unique Shots
One of the simplest ways to create stunning and distinctive flower photographs is to get as close as possible. Instead of settling for a distant shot from a few feet away, aim to fill the frame with your subject.
Achieve this by using a telephoto lens and zooming in on the flower. Pay attention to the lens’s magnification ratio; some lenses can focus exceptionally close. A 1:1 magnification ratio is ideal, but you can still achieve excellent results with ratios of 1:2, 1:4, or even 1:6. If your telephoto lens can focus closely, it can be a great tool for capturing beautiful flower shots.
If you can’t get as close as you’d like with your lens, consider two options. First, use extension tubes, which attach to your camera and enable your lens to focus closer. Second, employ a close-up filter that attaches to the front of your lens and acts like a magnifying glass. Both options have their drawbacks; extension tubes can be cumbersome, and close-up filters may reduce image quality. However, they can be useful, especially for beginners in flower photography.
For significant improvement and versatility in your flower photography, consider investing in a dedicated macro lens. These lenses allow you to capture intimate shots without the need for additional equipment. While they come at various price points, even more affordable macro lenses in the 40mm to 60mm range can provide exceptional image quality and the ability to get extremely close to your subjects.
6. Utilize a Reflector for Balanced Lighting
When photographing shaded flowers against a well-lit background during the early morning or late evening, you can achieve stunning results. However, this scenario can lead to underexposed flowers or overexposed backgrounds. To maintain a bright appearance for your flower subject and reduce the dynamic range of the scene, use a reflector. You can purchase an affordable pop-up reflector online or simply carry a white card. Adjust the position of the reflector until it directs some light onto the flower, ensuring balanced lighting. A reflector can also enhance the vibrancy of your flowers, creating a more appealing look.
7. Avoid a Distracting Background
Background selection is crucial in flower photography, as it can significantly impact the final image. A clean and uniform background can enhance your photograph, while a cluttered and distracting background will divert attention away from your main subject.
Before taking the shot, take a moment to consider the area behind your flower. Look through the camera viewfinder and ask yourself whether the background complements or distracts from the flower. If the background adds to the image or at least doesn’t detract from it, proceed with your photograph. However, if the background seems even slightly distracting, such as having jagged branches or unsightly patches of color behind the flower, it’s advisable to adjust your composition.
You can change your shooting position to eliminate distractions. For example, get down low until the flower is against a clear sky, or move slightly to the right or left to remove problematic elements from the frame.
8. Utilize a Shallow Depth of Field for Beautiful Background Blur
Using a shallow depth of field is an effective technique to create visually appealing flower photographs. A shallow depth of field results in a narrow area of sharpness, with the rest of the image appearing beautifully blurred. While achieving this effect requires precise focus, the striking results are often worth the effort.
To attain a shallow depth of field, use a wide aperture (indicated by a low f-number), such as f/2.8 or f/4. This aperture setting not only creates a shallow depth of field but also allows for faster shutter speeds, increasing the likelihood of capturing a sharp image.
Additionally, get as close to your subject as possible. The closer you are to the in-focus area, the more pronounced the background blur will be. Finally, try to increase the distance between the flower and the background. A more distant background will appear with greater blur, enhancing the overall aesthetics of the image. Look for subjects that are situated far in front of background elements or get down low to the ground to ensure the background consists of distant objects.
9. Maintain Sharpness in a Portion of the Flower
When striving to achieve the shallow depth of field effect, it’s essential to keep a part of the flower in sharp focus to provide an anchor point for the viewer’s eye. Without a clearly defined point of focus, the image may appear confusing or lacking direction.
To ensure that a portion, even if it’s a small part, of your images remains sharp, take specific steps. In good lighting conditions, increase your shutter speed and focus meticulously. In low-light situations, use a tripod and a remote release to prevent camera shake, or adjust your ISO settings as needed.
Keep in mind that even when there seems to be no wind, flowers can move slightly. It’s a good practice to review images on your camera’s LCD screen, zoom in, and check for sharpness. If the flower isn’t sharp, consider raising the shutter speed by a stop or two.
Additionally, verify your focus carefully, and if necessary, switch to manual focus. Ensure that the critical parts of the flower, such as the petals and the flower center, are sharply rendered before proceeding with other compositions.
10. Experiment with Different Angles and Perspectives
To capture truly unique flower photographs, don’t limit yourself to standard angles. While it’s a good starting point, once you’ve captured some safe shots, explore alternative viewpoints, focal lengths, and compositions.
Try photographing the flower from beneath to capture an intriguing perspective, even if it means getting a bit muddy in the process. This approach can result in a stunning image featuring a rarely-seen angle. Shooting from a low angle can also help you frame your subject against a backdrop of white, blue, or even orange sky.
Experiment with shooting from above, getting extremely close to the flower, or zooming out for a wider environmental shot. The key is to maximize experimentation, review the results, and make adjustments the following day based on your observations.
11. Experiment with Intentional Camera Motion for Abstracts
Flower photography doesn’t always have to produce sharp and clear images. Embracing unconventional techniques can lead to breathtaking results, and one such approach is intentional camera motion (ICM). By intentionally slowing down your shutter speed to around 1/15s and moving your camera deliberately while taking the shot, you can create abstract images filled with natural colors and intriguing geometries. Experiment with side-to-side or up-and-down movements for different effects.
Turn off any camera or lens image stabilization as you want the camera to capture the shake. While the results may be unpredictable, that’s part of the charm. Explore various types of motion and shutter speeds, as this can be a lot of fun. Often, the most stunning shots come from the unexpected. Embrace the unpredictability, and don’t hesitate to try different approaches; you might discover an incredible shot that captures the essence of a flower in a way you never thought possible!
12. Focus Through Another Flower
The shoot-through technique, favored by many professional flower photographers, produces visually striking results. It involves framing your primary flower subject by positioning another flower between the lens and the subject. The closer the foreground flower is to the lens, the more pronounced the colorful foreground blur will be, creating an appealing effect.
Carefully manage the position of the foreground flower to avoid overwhelming the main subject with excessive blur. You can also experiment with different apertures to see how they affect the effect.
13. Photograph After the Rain
Photographing flowers immediately after a rain shower can yield captivating results. Raindrops left on the flowers add a fresh and visually appealing dimension to your images. The cloudy skies following rain provide soft, diffused light that enhances the overall aesthetics of the flowers.
Some photographers even carry a small spray bottle to recreate the raindrop effect when it’s dry outside. This is an optional technique to explore. Capturing the details of water droplets on petals up close can be an exciting endeavor. Experiment with different angles and perspectives to see how light interacts with the water droplets, revealing a unique way to capture and photograph flowers.
14. Go Wide
While close-up shots are commonly associated with flower photography, don’t overlook the beauty of capturing flowers from a wider perspective. Flowers look stunning not only in intricate close-ups but also from a distance. By going wide, you can appreciate not just a single flower’s charm but also the visual harmony they create collectively in a scene.
You can photograph a cluster of flowers to showcase a variety of colors and species in a small area, creating a vibrant and dynamic composition. Alternatively, go even wider to capture an entire field of flowers during sunset, crafting a flower landscape image that tells a more expansive story.
Even macro lenses, with their closest focusing abilities, can capture beautiful wide shots. However, feel free to experiment with wide-angle lenses or standard zoom lenses like an 18-55mm kit lens if you want to photograph expansive scenes. Changing lenses can offer new perspectives, inviting you to see the world of flowers in a fresh and enchanting way!
15. Don’t Forget Post-Processing
While flower photos can look impressive straight out of the camera, especially when shooting in RAW format (which is highly recommended), spending some time on post-processing can significantly enhance your images. Post-processing allows you to fine-tune tones, colors, and the overall feel of your photographs.
The specific adjustments you make will depend on your preferences and creative goals. As a starting point, consider subtle enhancements like increasing saturation or vibrance for more vivid colors. You may also want to raise shadow levels to reveal details in darker areas, lower highlights to recover information in brighter areas, and boost contrast for added pop.
As you become more familiar with flower photo editing, you can explore more dramatic color alterations and experiment with local adjustments, selectively darkening and lightening parts of the image to guide the viewer’s eye in a particular direction. Post-processing offers a valuable opportunity to elevate your flower photos to the next level.
The Bottom Line
Well, there you have it: 15 simple tips to elevate your flower photography to the next level. Hopefully, at least one or two of these ideas resonate with you, and you’re feeling inspired to get out there and start capturing! Remember that flower photography is a wonderful passion, and with dedication and experimentation, you’re bound to achieve some fantastic results. So, grab your camera, head outdoors, and let your creativity blossom in the world of flower photography!