



Interested in capturing stunning foggy photos? I’m here to provide guidance.
For many photographers, there’s nothing quite like the allure of shooting in the midst of fog. The enigmatic shapes, silky textures, and ethereal light create a truly magical experience that yields breathtaking photographs.
However, achieving remarkable fog photography can be challenging. Fog can be unpredictable, leading to focusing and sharpness difficulties, particularly in low-light conditions that encourage camera shake. To consistently create captivating fog photos, the kind you might see adorning gallery walls, you need a well-thought-out approach. This involves planning for the right conditions, using appropriate equipment, selecting optimal settings, and more.
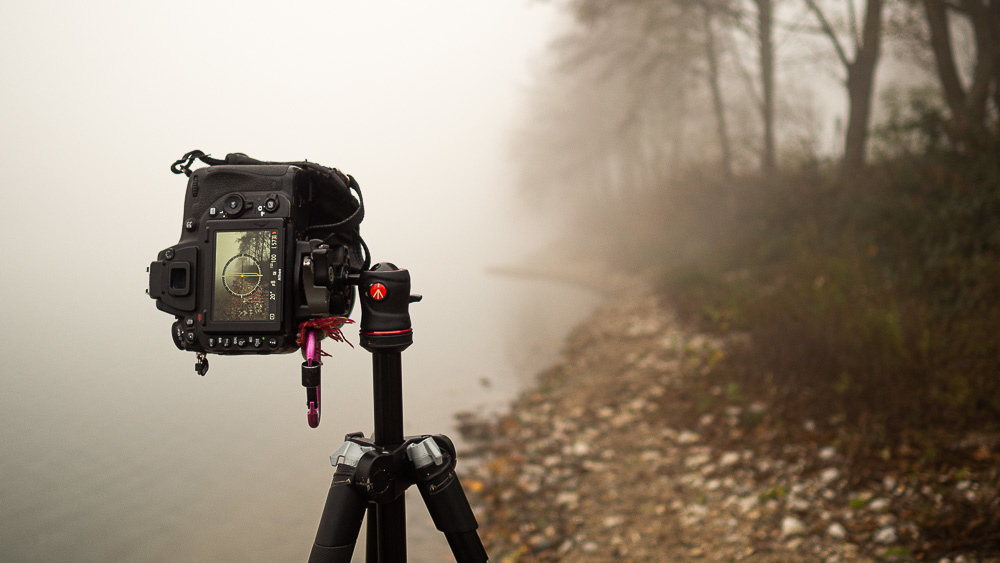
As an experienced fog photographer, I’ve developed numerous strategies to help you consistently capture exceptional shots in foggy conditions. In this article, I’m sharing my top 13 tips to assist you in creating mystical and captivating images. Let’s dive right in, starting with:
1. Anticipate Fog Before It Occurs
The most challenging aspect of fog photography is often finding the fog itself. In many regions, fog is a rare phenomenon, and photographers have no control over the weather. To capture beautiful compositions when the right conditions arise, you must learn to predict fog in advance.
Fog Photography Tips:
- One simple method is to check the weather forecast. Fog predominantly occurs in the morning, so before you retire for the night, check your preferred weather app. Review the hourly forecasts for the next morning, and if you spot the “fog” icon, select a suitable location, set your alarm, and ensure you head out in the early hours.
- Another option is to wake up before sunrise and check for foggy conditions outside your home if you plan to shoot nearby. Keep in mind that fog can dissipate quickly, and by the time you confirm its presence, you might miss the opportunity.
- A more effective strategy is to learn to predict fog in advance. Familiarize yourself with the conditions conducive to fog, such as wet ground (following rain), low temperatures, weak winds, and relatively clear skies. Pay particular attention during late fall, winter, and early spring, as fog is more common during these cooler seasons.
Pro Tip: If you have a specific shot in mind and want to monitor the fog’s progress, consider using public webcams to view real-time conditions and determine if they align with your vision.
2. Bring Along a Tripod and Remote Shutter Release
Since fog often occurs at sunrise, and the diffused light can lead to dim conditions, it’s essential to be prepared. In darker scenes, you’ll need longer shutter speeds, so carrying a tripod and a remote shutter release is crucial to prevent camera shake.
The tripod will keep your camera stable when using shutter speeds of 1/60s and slower. It’s especially valuable if you intend to capture long-exposure fog shots (which I highly recommend; see additional tips later in this article). A remote shutter release, while not mandatory (you can use your camera’s two-second self-timer instead), helps prevent camera shake when pressing the shutter button, making your shooting process faster and more precise.
Additionally, if you’re using a DSLR, remember to lock up the mirror before shooting. Regardless of your camera model, consider using the electronic front-curtain shutter mode to reduce shutter-induced vibrations.
3. Opt for Manual Focus and a Narrow Aperture
Achieving sharp shots in fog can be challenging. Therefore, I recommend switching off your camera’s autofocus, especially for foggy landscape photography. Autofocus can struggle to lock onto subjects in low-contrast environments, leading to frustration.
Alternatively, you can use your camera’s autofocus to initially focus on the highest-contrast part of the scene and then fine-tune the focus using your lens’s focus ring.
I also advise shooting with a narrow aperture. A smaller aperture results in a greater depth of field, ensuring sharpness from the foreground to the fog-shrouded background. A deeper depth of field provides more flexibility if you accidentally focus slightly in front of or behind your subject. A good starting point is often f/8, but you can narrow the aperture further for exceptionally deep scenes or to accommodate potential focusing errors.
Keep in mind that a smaller aperture reduces the amount of light reaching the camera sensor, necessitating a slower shutter speed. However, with a tripod (as mentioned in the previous tip), this shouldn’t pose an issue.
4. Explore a Minimalistic Approach
Fog not only adds an air of mystery to landscapes but also serves as a natural tool for creating negative space. This allows you to simplify your compositions and draw attention to your subject. In essence, you can use fog as a blank canvas to craft visually striking minimalistic shots.
How does this work? In minimalism, the goal is to embrace empty, negative space while featuring a clear focal point within the scene. By enveloping your subject in expansive fog, you guide the viewer’s gaze to what truly matters.
Negative space not only simplifies your photos but also adds an emotional layer. By using fog to remove distracting elements, you can evoke feelings of mystery, solitude, or tranquillity. The emptiness surrounding the subject contributes to a powerful atmosphere that enhances the entire image.
Don’t limit yourself to isolating your subject; experiment with abstract compositions as well. In areas with dense fog, getting up close can turn shapes and silhouettes into compelling elements to explore. A lone tree branch or a building enveloped in mist can yield minimalistic geometries, creating beautiful abstract photographs.
In summary, when fog rolls in, consider adopting a minimalistic approach. Concentrate on the simple yet captivating elements within your scene. Let the fog guide your eye, and craft compositions that might otherwise go unnoticed.
5. Seek Elevated
Perspectives To capture breathtaking fog-covered landscapes, consider positioning yourself above the fog rather than shooting from within it. Scout out vantage points, ensure you’re in place as the sun rises, and photograph the fog as it blankets trees and structures.
If you’re fortunate, you might capture sunlight filtering through the fog from above, creating a wondrous visual effect.
For serious high-angle fog photography, think about investing in a drone. This allows you to capture stunning shots regardless of whether you have access to elevated vantage points.
A useful tip: When shooting from above the fog, you may encounter high dynamic range scenes that challenge many cameras. Take a series of bracketed shots to ensure you capture the full range of tones. If the dynamic range proves too vast, you can blend multiple exposures during post-processing to achieve a well-exposed final image.
6. Safeguard Your Equipment
Fog may be a captivating subject, but it’s also composed of moisture that can harm your gear. Even weather-sealed cameras and lenses are not entirely immune to fog-related damage. To protect your equipment, adhere to this simple rule: keep your camera stored in your bag until you’re ready to use it, minimizing exposure to moisture.
Additionally, always have silica gel packets in your camera bag. You can purchase them online or obtain them from local shoe stores if you ask nicely. Placing several packets throughout your bag’s compartments helps absorb any moisture that your gear might bring in.
Pro Tip: Remember to replace or regenerate the silica gel regularly, as it can become oversaturated and lose its effectiveness. Keeping silica gel on hand is not only beneficial for fog photography but also for shooting in tropical, rainy, or snowy conditions. It can also protect other sensitive accessories like memory cards and batteries.
After returning from a fog photography outing, allow your camera bag to air out. Consider placing your gear in an airtight container with a few silica gel packets for added protection.
If you frequently photograph in moist conditions, consider investing in a dry cabinet. While it may seem like an expense, it’s a crucial step to ensure the longevity of your equipment.
7. Explore Ordinary Subjects
Fog has a remarkable ability to transform ordinary scenes into something extraordinary. While you can capture more traditional subjects on foggy days, such as seascapes and skyscrapers, don’t overlook the everyday, mundane, or clichéd subjects.
For instance, you can capture compelling shots by visiting your local park and photographing trees, cattails, and fields. Take a stroll through your neighborhood streets and frame fog-covered streetlights, houses, and cars.
Moreover, you can use fog to capture unique images of frequently photographed locations. While everyone may photograph the Golden Gate Bridge, capturing it in the midst of morning fog can yield distinctive and breathtaking shots.
8. Utilize a Neutral Density (ND) Filter
Neutral density filters are designed to reduce the amount of light entering your camera. Placing a strong ND filter over your lens allows you to use slower shutter speeds, even in brighter conditions. This is particularly useful for fog photography, as it enables you to capture smooth, silky fog that adds a mesmerizing quality to landscape shots.
Long-exposure fog appears as if it were flowing like water, creating a unique visual effect in your photographs.
ND filters come in various strengths, so choose one based on the time of day and lighting conditions. If you’re shooting before sunrise, you may need a relatively weak filter or none at all. However, if you’re shooting from an elevated position in bright sunlight, a 10-stop or even 15-stop filter may be necessary.
Pro Tip: When using an ND filter, set up your composition and focus carefully before attaching the filter to your lens. Strong ND filters are highly opaque, making it challenging to see the scene through your camera’s viewfinder once the filter is in place.
9. Embrace Fall for Fog Photography
Autumn is a magical season for fog photography, as it often coincides with foggy mornings. Beyond the cooler temperatures that encourage fog formation, the combination of foggy ambiance with the vibrant colors of fall leaves creates truly breathtaking imagery.
Autumn offers a range of subjects that complement the foggy atmosphere. Falling leaves, harvest themes, withering plants, and Halloween-inspired scenes all blend beautifully with fog, evoking nostalgia, a sense of closure, and a touch of spookiness.
When autumn arrives, seize the opportunity to photograph on foggy days. Explore forests when fall foliage is at its peak to capture the striking interplay of gray fog and colorful leaves. Delve into the unique details that come alive in the fall, such as dew-kissed spider webs, mist-covered fields, and solitary structures. Let the combination of fog and autumn inspire your creativity to produce moody and captivating images.
10. Experiment with Different Focal Lengths
While wide-angle lenses are often the go-to choice for fog photography, don’t limit yourself to a single focal length. Telephoto lenses, typically not associated with foggy scenes, can offer a captivating perspective.
Telephoto focal lengths, such as those in the 70-200mm range, are ideal for capturing more intimate fog images. Focus on specific details like a single tree in a fog-shrouded field or the delicate dew on a spider web. At 200mm, you can isolate subjects within the fog, creating powerful compositions that draw viewers in.
You can also use a 70-200mm lens to photograph distant landscapes, where longer focal lengths compress space, making the fog appear denser and intensifying the mood.
Don’t be afraid to experiment with various focal lengths and perspectives, including standard 50mm lenses. Mixing wide-angle and telephoto shots can yield a diverse collection of foggy images, each with its own unique charm.
11. Experiment with Shutter Speeds
While long-exposure techniques can yield ethereal effects in fog photography, it’s important to vary your shutter speeds. Excessively long exposures can cause the fog to lose its definition and appear flat.
To find the right balance, experiment with different shutter speeds when capturing a foggy scene. Take the time to test various settings and review the results on your camera’s LCD screen. Sometimes, slower shutter speeds might produce the desired effect, but on other occasions, faster shutter speeds may be more suitable.
Don’t hesitate to use relatively quick shutter speeds, such as 1/60s or 1/125s, as they can add texture to the fog, resulting in captivating images.
12. Continue Shooting Until the Fog Clears
Fog is a dynamic and ever-changing phenomenon. It can transition from dense and mysterious to revealing breathtaking landscapes. Therefore, don’t pack up your camera when you notice the fog beginning to dissipate. Keep searching for compositions and continue capturing images, as you might stumble upon stunning scenes as the fog evolves.
As the fog lifts, monitor your camera settings, as it’s easy to unintentionally overexpose your shots when sunlight penetrates the fog. Experiment with different camera settings to explore unique effects, adjusting your aperture or exposure as the lighting conditions change with the movement of the fog.
Patience is a valuable asset in fog photography. Keep your camera ready and observe the various stages of a foggy cityscape or landscape. You never know when you might encounter a once-in-a-lifetime scene, especially during sunrise or sunset when beams of light break through the foggy atmosphere.
Pro Tip: Regularly check a weather app on your phone to obtain information about the fog’s potential movements and density. Flexibility in adapting to changing conditions will maximize your opportunities on a foggy day.
13. Edit Your Fog Photos for Optimal Results
If you’re committed to producing outstanding fog photos, consider editing as a means to transform great images into truly spectacular ones. Think of editing not merely as a way to correct poorly captured shots but as a tool to enhance your already excellent photographs.
Begin by experimenting with fundamental adjustments such as contrast, exposure, and white balance. These tweaks can help maintain natural colors and details while balancing the emptiness of the shot with the main subject to create a more engaging composition.
Local adjustments, such as dodging and burning, can accentuate details in the fog and add depth to the image. Apply these adjustments gradually and subtly for striking results.
Color grading is another creative technique at your disposal. Enhance the mood of your foggy scene by experimenting with different color tones. The right choice of hues can elevate the emotions and atmosphere captured in your image, so take your time to find the perfect balance.
Don’t be afraid to explore new editing techniques. While there are standard adjustments that are often effective, you can discover unique ways to enhance your fog photos.
You don’t need to be a Photoshop expert to make these changes; beginner-friendly tools like Lightroom and Luminar can help you achieve professional results. The key is practice, experimentation, and enjoying the editing process. Your fog photographs will improve as you become more comfortable with editing.
The Bottom Line
Fog photography offers a wonderful opportunity to unleash your creative potential. By following the straightforward tips I’ve outlined, you’ll be well-equipped to capture stunning images that convey the mood and essence of foggy landscapes.
Remember, you don’t need to be a professional photographer or own the latest equipment to create exceptional fog photos. All that’s required is your passion, a spirit of adventure, and a willingness to view the world through the lens of fog.
Even if you encounter challenges along the way, don’t lose heart. Return to this article, identify areas for improvement, and persevere in your photographic journey. With practice and dedication, your fog photography skills will undoubtedly flourish. So, embrace the fog, explore its mysteries, and keep on shooting!