



Many contemporary photographers aspire to delve into the art of macro photography, inspired by the proliferation of stunning online images showcasing small plants, animals, and insects. While macro photography can be challenging, particularly for beginners, it stands as one of the most rewarding forms of photography. With the right skills, you can capture remarkable images, even within the confines of your own backyard. To embark on your journey into the world of macro photography, consider absorbing the tips and techniques offered in this guide, which are imparted by an award-winning macro photographer whose work has graced the halls of the Smithsonian Museum of Natural History. By the end of this tutorial, you will possess the knowledge and skills to translate these recommendations into captivating macro photographs.
For those who lean towards visual learning, we have created a video introduction to macro photography. This video covers many of the same topics as this article, albeit with some sections condensed for brevity.
What Constitutes Macro Photography?
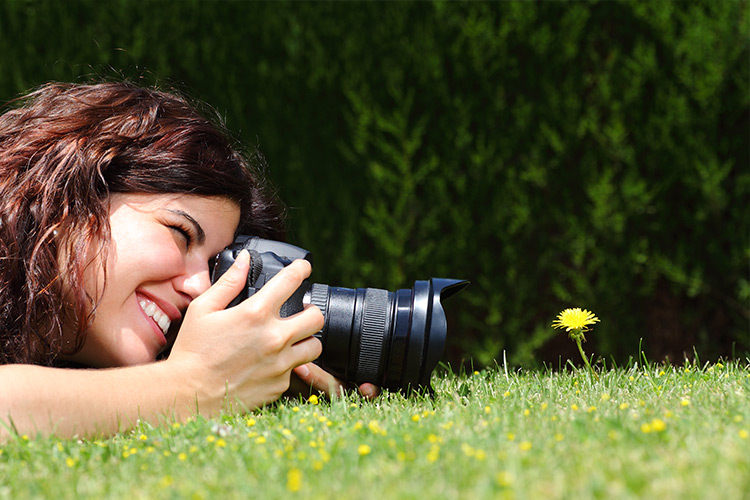
Macro photography is a specialized field dedicated to capturing close-up images of diminutive subjects, ranging from insects to flowers. It can be practiced both in a controlled studio environment and amidst the backdrop of nature, as long as you achieve adequate magnification of your chosen subject.
Officially, macro photography is defined as the process of capturing images of small subjects at a magnification of “life size” or greater. To elaborate, this means that your subject must be the same size as your camera sensor or smaller, occupying the entire frame. For example, if your camera sensor is one inch wide, you would photograph something one inch or smaller.
However, this definition can be quite stringent, and photographers often label an image as “macro” even if it portrays a slightly larger subject. Many of the photos in this article do not strictly adhere to this technical definition but are considered close-up photographs nonetheless.
Introducing Macro Photography for Novices
How does one embark on the journey of capturing macro photos? Here are the essential steps:
1. Familiarize yourself with macro photography terminology.
2. Select the appropriate camera and lens equipment.
3. Achieve sufficient depth of field.
4. Configure camera and flash settings for well-lit photos.
5. Focus on the most crucial part of your subject.
6. Understand the typical behaviors of different insects.
7. Compose and capture your shot.
Some of these steps can be more challenging than they initially appear, such as obtaining adequate depth of field and pinpointing the most critical element of your subject. Nevertheless, the guidance provided throughout this macro photography tutorial will provide you with a solid foundation and enable you to master these skills with practice.
Understanding Magnification
In macro photography, it is crucial to comprehend the apparent size of your subject on your camera sensor. This comparison between your subject’s size in reality and its size on your sensor yields a value known as magnification.
When this ratio is precisely one-to-one, your subject attains “life size” magnification. For instance, if you are photographing something that measures one centimeter in length and it is projected as one centimeter onto your camera sensor, it achieves life size, regardless of your camera sensor’s dimensions.
Most DSLR and mirrorless camera sensors typically range from approximately 17 millimeters to 36 millimeters in width. Consequently, a subject measuring 1 centimeter becomes relatively substantial in the photograph, especially if you intend to create large prints, where the tiny subject may appear billboard-sized.
To facilitate understanding and comparisons, macro photographers employ specific ratios rather than continually referring to “life size” or “half life size.” Notably, life size corresponds to a 1:1 magnification ratio, while half life size corresponds to 1:2 magnification. As you approach one-tenth of life size, you arguably transition away from close-up or macro photography.
Superb macro lenses offer the capability to shoot at 1:1 magnification or even greater. For instance, Canon offers a macro lens with 5:1 magnification, equivalent to 5x magnification, which is truly exceptional. However, some lenses labeled as “macro” may only provide 1:2 magnification or less. Ideally, it is recommended to select a lens that offers at least 1:2 magnification, and ideally 1:1 magnification, for maximum flexibility.
Exploring Working Distance
Working distance is a straightforward concept – it denotes the distance between the front of your lens and the closest point of your subject. If your working distance is too minimal, you risk startling your subject or obstructing the light due to excessive proximity. Ideally, aim for a working distance of approximately six inches (15 centimeters), with an even better scenario involving twice that distance or more.
The working distance of a lens is smallest at 1:1 magnification since capturing such extreme photos necessitates getting as close as possible to your subject. Longer focal length lenses offer more extensive working distances compared to lenses with moderate focal lengths. For instance, Nikon’s 200mm f/4 and Canon’s 180mm f/3.5 are prime examples of macro photography lenses boasting generous working distances. Conversely, the Nikon 60mm f/2.8 macro lens provides a significantly smaller working distance.
It is advisable to opt for a lens with the most substantial working distance possible to minimize the risk of startling your subject or casting shadows on it. However, macro lenses with longer focal lengths, such as 180mm or 200mm, tend to be more expensive. If you are seeking a balance between price and working distance, consider a lens within the 100mm to 150mm range. Personally, I use a 105mm macro lens.
Choosing the Best Cameras for Macro Photography: DSLR vs. Mirrorless
Both DSLR and mirrorless cameras can excel in macro photography. The key factor is selecting a camera that allows you to use a quality macro lens and ideally possesses minimal lag between observing your subject, pressing the shutter button, and capturing the image. Historically, DSLRs held an advantage in these aspects due to electronic viewfinders with lag and a limited selection of native macro lenses for mirrorless cameras. However, contemporary developments have rendered these differences largely inconsequential, sometimes even favoring mirrorless systems.
Mirrorless cameras often offer additional benefits that can enhance your macro photography experience, such as focus peaking, which displays which parts of your subject are in focus—an invaluable feature for manual focus macro photography. Furthermore, the ability to review your photos without diverting your gaze from the viewfinder proves beneficial when evaluating factors like sharpness and flash exposure quickly.
One important caveat is that if you opt for a mirrorless camera, it is advisable to select one equipped with an electronic viewfinder. Attempting to compose and stabilize a macro photo using a rear LCD screen, especially at high magnifications like 1:1, can be exceedingly challenging. As mirrorless cameras with electronic viewfinders often command a higher price, you might consider investing in a DSLR, potentially a used one, if you are on a budget. Regardless of your choice, rest assured that you can achieve outstanding results with any camera, as macro photography of such intricate subjects is inherently demanding, and no camera can guarantee a perfect keeper rate.
Macro Photography Cameras: Full-Frame vs. Crop-Sensor
For those aiming to capture images with maximum magnification, full-frame cameras are often considered excessive for macro photography. Surprisingly, even a camera like the Nikon D850, boasting 46 megapixels, cannot match the macro detail achievable with the 20-megapixel Nikon D7500 due to the latter’s slightly higher pixel density.
In macro photography, the pixel density (the number of pixels per square millimeter of the sensor) primarily determines the maximum detail you can extract from your subject. Despite having more total pixels, the D850’s larger sensor contains fewer pixels per millimeter than the crop-sensor D7500. In most photography genres, larger and more abundant pixels are preferable, but in 1:1 macro photography, pixel density takes precedence. This is because cropping a D850 photo to match D7500 images results in a loss of enough pixels that the D7500 emerges as the winner, albeit marginally.
Nonetheless, full-frame cameras remain a solid choice for macro photography and offer a range of advantages, especially when not shooting at maximum magnification. Therefore, a full-frame (FX) camera typically outperforms a crop-sensor (DX or APS-C) camera in macro photography, though the difference is less pronounced than in other photographic disciplines.
Canon vs. Nikon: Best DSLR for Macro Photography
In most photography genres, debates over which camera brand, be it Canon, Nikon, Sony, or others, reign supreme are typically nuanced and subjective. While distinctions exist, they rarely constitute deal-breakers for the average user.
However, in the realm of macro photography, some additional considerations come into play. Notably, Canon cameras calculate aperture differently from other brands. Specifically, when shooting at high magnifications like 1:1, Canon cameras may inaccurately display your aperture value. For instance, the camera might indicate f/11, while all aspects of the photo, including diffraction, depth of field, and exposure, behave as if you were shooting at f/22.
This discrepancy arises because aperture behavior becomes unpredictable at extreme magnifications. In essence, when the aperture physically measures one size, it acts as if it were another size. In contrast, Nikon, Sony, and other manufacturers provide the “functionally correct” aperture value (e.g., f/22 in this scenario), while Canon does not. Thus, when using Canon cameras, it is essential to bear this in mind. The more frequently you alter magnifications, the more pronounced this issue becomes.
Depth of Field for Close-Up Photography
In the realm of non-macro photography, your subjects typically maintain some distance from your camera – perhaps around 5 to 6 meters or even as distant as the horizon. Within these ranges, employing a standard aperture like f/8 or f/11 generally results in a sharply focused scene from the foreground to the background (excluding extreme telephoto shots since telephoto lenses have less depth of field).
However, macro photography presents a different challenge. When you’re capturing close-up images, you invariably encounter very limited depth of field, even when using small aperture values. At 1:1 magnification, your depth of field can become so shallow that you might struggle to render both the head and feet of a fly sharply focused simultaneously, despite their mere millimeters of separation!
This meager depth of field issue is intertwined with another obstacle in macro photography – insufficient lighting. Why does this happen? There are four primary reasons why you often deal with limited light in macro photography:
- Your camera inherently obstructs some of the natural light.
- Your flash might not be oriented at the correct angle to adequately illuminate your subject.
- Small apertures like f/11, f/16, or smaller are essential to achieve the necessary depth of field, but they reduce the amount of light entering the lens.
- You need exceptionally fast shutter speeds to minimize motion blur (which is accentuated in close-up photography), further darkening the image.
When all these factors converge, your close-up photos can end up appearing as if you left the lens cap on in broad daylight. So, how do you balance depth of field with capturing sufficient light? There are several methods, each with its unique trade-offs.
Method 1: Widen Your Aperture
You may opt to accept a shallow depth of field for your macro photography, to the extent that capturing an entire ant’s head in sharp focus simultaneously may be unattainable. If this seems acceptable to you, simply widen your lens’s aperture as much as possible (or only slightly stop down – somewhere between f/2.8 and f/5.6), and you’re ready to capture macro photos.
The advantage of this approach is that you won’t need to worry about intricate lighting setups or software adjustments to make your macro photos look appealing, as you’ll generally gather enough light to make things work. The drawback, however, is that achieving precise focus when handheld at extreme magnifications becomes nearly impossible due to the negligible depth of field.
For this reason, this method is most effective when photographing subjects of a somewhat larger scale, ranging from 1:4 to 1:10 magnification. However, I do not recommend it if you intend to capture life-size photos at 1:1 magnification.
Method 2: Reduce Aperture Size and Use a Flash
The subsequent method (and the one I utilize the most) involves narrowing the aperture to a small value, typically around f/16 or f/22. The advantage of employing such a small aperture is that it becomes somewhat easier to bring your subject into focus, although it remains challenging, and your depth of field becomes more manageable.
However, using a flash is virtually obligatory with this method since you are losing a substantial amount of light. Additionally, diffraction starts to noticeably affect the sharpness of your photos. Nonetheless, it’s essential to bear in mind that an f/22 image with diffraction appears considerably sharper than an f/4 image without any depth of field.
Method 3: Stack a Series of Macro Photos
Another technique is focus stacking. This method entails capturing your photos at “moderate” apertures, such as f/8 or f/11, which minimizes diffraction but results in a shallow depth of field.
To counteract this limited depth of field, you capture multiple photos at varying focus distances and subsequently merge the sharpest portions of each image during post-processing. For instance, you might capture one photo where the bug’s head is in focus, another where the wings are sharp, and a third where the rear legs are in focus. These images can then be blended into a single, well-focused image of the bug from front to back. We also offer a separate tutorial on focus stacking at Photography Life.
This method boasts two advantages: first, it produces exceptionally high image quality since diffraction is not a concern, and second, it allows you to artificially extend your depth of field to ensure that any subject can be uniformly sharp from the foreground to the background, even at significantly high magnifications.
However, there are numerous downsides. Focus stacking is typically restricted to studio setups with tripods due to the necessity for precise focus. Another challenge is the time commitment; for optimal quality, you may need to merge dozens of photos into a single image, which can consume hours during both photography and post-processing. Specialized software is also required to combine focus-stacked images, such as Photoshop or Helicon Focus, with more advanced options often incurring additional costs.
The most significant challenge, however, is that your subjects must remain entirely still. While it is possible to find stationary insects, it isn’t always straightforward. This method is best suited for plants or insects that are sedentary and waiting for the sun to rise (try early morning shots).
This option is also relatively costly, as it demands a considerable amount of specialized equipment, including a sturdy tripod, a tripod head, a macro focusing rail, and specialized software, for the most dedicated focus stackers.
Method 4: Tilt the Plane of Focus
The final approach to increase depth of field involves acquiring a specialized macro photography lens: a tilt-shift lens. These lenses allow you to adjust the orientation of the depth of field across your subject. For instance, you may be able to focus simultaneously on a bug’s head and wings, even though they are at varying distances from the lens. This technique potentially enables you to capture an entire bug in sharp focus within a single photo at more reasonable apertures than usual.
However, there are several drawbacks. Firstly, tilt-shift macro lenses (like the Nikon PC-E 85mm f/2.8D) are relatively expensive, with used models costing at least $1000 and new ones reaching up to $1800. They generally do not focus at 1:1 macro magnification (usually around 1:2 instead), they require manual focusing, and they can be challenging to use without a tripod. Such lenses are primarily well-suited for studio work involving stationary subjects, in which case focus stacking may be the preferred option. This is not to say that this method is always unsuitable, but it is highly specialized, and most photographers may not find tilt-shift lenses to be the most versatile choice.
Which Method Is Best for Achieving Sufficient Depth of Field?
Most macro photographers employ a combination of the aforementioned methods depending on the specific circumstances. Personally, I prefer to utilize a flash and a small aperture for high-magnification macro photography. When photographing larger subjects such as dragonflies and lizards, I opt for a wider aperture and natural light. However, with practice, the key is to discern which situations warrant each of these methods, making it easier to adjust your camera settings accordingly.
Focusing Techniques for Macro Photography
In the realm of high-magnification macro photography, achieving sharp focus on your subject can be a formidable challenge. Even with an incredibly narrow aperture like f/32, the area of your subject that will be in focus typically amounts to only a few millimeters. It can be particularly demanding to precisely place the focus on a tiny subject, especially considering that slight hand movements, such as your pulse, can cause your hands to move more than the desired focus range. To succeed, you may find yourself taking photos between breaths and heartbeats – seriously – as any movement can make it nearly impossible to obtain a focused image.
Furthermore, at such close distances, the autofocus systems in even the most advanced DSLRs and mirrorless cameras struggle to keep up with your hand movements. Attempting to use autofocus, especially at high magnifications like 1:1, often leads to frustration. Unless you are using a tripod, your camera’s focusing system may find it impossible to lock onto a subject.
However, all hope is not lost. It is still feasible to capture sharp macro photos at 1:1 magnification, even when shooting handheld. I will cover various techniques below. It’s important to note that the following information may not be necessary if you are shooting with a tripod. In that case, you can comfortably use autofocus or live-view manual focus without significant issues.
The Easiest Technique: Manual Focus
At 1:1 macro distances, you will almost certainly need to focus manually, as the autofocus system in any camera cannot respond quickly enough to counteract your hand movements. However, manual focus in macro photography requires a different approach than you might use for non-macro photography.
Some photographers attempt to manually focus by holding the camera as steady as possible and turning the focus ring left or right until the viewfinder image appears sharp. However, this method is ineffective for handheld macro photography. The act of manually focusing in this manner introduces more instability into the frame due to hand movements, making it nearly impossible to achieve rapid changes in focus.
A more effective approach is to set your macro lens to a specific magnification and then slowly rock the camera forward and backward, often using a stick or monopod to aid stability, moving only millimeters at a time while peering through the viewfinder. When you observe a sharp image in the viewfinder, take the shot.
Although this method is not perfect, it can yield a keeper rate of around 40% for 1:1 macro photos of subjects the size of small insects, which is a commendable success rate considering the challenges of handheld macro photography. With practice, you can improve your success rate even further, but capturing sharp macro images at the highest magnification levels remains a demanding task.
Focusing Technique for Lower Magnifications
When you are not attempting maximum magnification and are shooting subjects that are about ten centimeters (4-5 inches) in size, autofocus is generally a more reliable option for macro photography. Given the potential for slight hand movements, especially at these magnifications, I recommend using the AF-C focusing mode (also known as Continuous or AI-Servo). This mode allows your camera to continuously adjust focus to maintain the best focus on your subject as you or the subject move.
Aligning Your Macro Subject with Your Depth of Field
As emphasized throughout this tutorial, macro photography presents the challenge of an extremely shallow depth of field, irrespective of your chosen aperture. One effective strategy to optimize your chances of capturing a well-focused image is to align your subject as parallel as possible to your depth of field. By doing so, you increase the likelihood of keeping more of your subject within the limited focus zone. In the example below (not a 1:1 macro shot, but the principle applies), the damselfly is almost entirely in focus despite the inherently shallow depth of field.
In some cases, you may need to choose which part of the subject to prioritize for sharp focus. Typically, the eyes of the subject are the most critical parts of the image, as they often convey the most essential visual information. However, for certain subjects, such as ladybugs and butterflies, you might prioritize other elements, such as the wing pattern. Regardless, achieving precise focus is a pivotal aspect of macro photography. You can explore our more extensive tutorial on this subject if you desire a deeper understanding.
Step-by-Step Guide to Macro Photography
One of the most effective ways to excel in macro photography, or any genre of photography, is to establish a systematic approach, a set of steps that you follow even before taking a shot. In macro photography, particularly when aiming for high-magnification close-up images with flash as the primary light source, consider the following step-by-step process:
- Acquire a monopod or find a suitable stick for added stability.
- Ensure you have a powerful flash unit and use a diffuser to soften the light. If you lack a diffuser, you can often create one yourself using materials like cardboard, tin foil, tape, and paper towels (no joke). Familiarize yourself with macro photography lighting by experimenting with various setups.
- Attach a macro lens to your camera and set it to manual focus at your intended magnification.
- Configure your exposure settings to capture enough light. When flash serves as your primary light source and you’re shooting at 1:1 magnification, opt for the fastest shutter speed that syncs with your flash (typically 1/200 or 1/250 second). Use an aperture ranging from f/16 to f/22.
- Set your ISO to a level that results in an accurate exposure when the flash fires at roughly 1/4 power for a leaf. While this may seem arbitrary, it’s an effective choice because it ensures you have a bright enough flash while still allowing for reasonably quick recharging between shots. Therefore, select an ISO setting that results in the flash firing at approximately 1/4 power most of the time.
- Switch your flash to TTL (automatic) mode. Even in automatic mode, you can anticipate that it will tend to hover around 1/4 power due to step 5.
- To achieve an accurate exposure, adjust your flash exposure compensation, potentially requiring an adjustment of several stops. It’s not uncommon for macro photography to involve flash compensation of around +2 or even +3 stops.
- At this point, the only “automatic” setting you’re utilizing is auto flash, which will adapt to the subject’s reflectivity. Keep all other settings, such as aperture, shutter speed, and ISO, constant and avoid altering them.
- Place your camera on a monopod or a stable stick if it doesn’t interfere with reaching your subject at the desired height.
- Locate a stationary bug or subject that remains still long enough for you to photograph, preferably one the size of a housefly or larger.
- Focus using the manual focus technique outlined earlier in this tutorial, and take the shot.
- During the editing stage, watch out for dust spots, and you’re done.
Macro Photography Composition Tips Reimagined
In the realm of macro photography, the principles of effective composition remain steadfast. Just as in other photographic styles, it’s crucial to maintain balance within your frame and exclude unnecessary distractions. Nevertheless, macro photography introduces unique aspects of composition that deserve special attention.
Engage with the Background’s Bokeh
Macro photography’s charm lies, in part, with its ethereal backgrounds, often reduced to captivating blurs of color and light. To master macro composition, it’s vital to be attuned to this background magic.
For instance, consider the potential of a low-angle shot that frames an out-of-focus blue sky as a backdrop. Alternatively, explore different perspectives that transform the background into a canvas of autumn leaves’ hues. Lush green grass can harmonize beautifully with diverse subjects. And don’t hesitate to experiment – ask a friend to stand behind your subject donning a vividly colored shirt to craft a unique backdrop.
The photograph below brilliantly captures attention through the stark contrast of a vibrant orange dragonfly against a verdant green background. Seek out such contrasts, as they can elevate your macro shots to new heights.
Additionally, as you venture closer to your subject, intriguing phenomena occur within the background. When you employ a flash to illuminate a scene at 1:1 or 1:2 magnification, you might witness the background darkening, potentially to a deep black.
This phenomenon can be explained by the behavior of light. As your distance from a light source increases twofold, the amount of light reaching the background decreases fourfold. In macro photography, where the flash or diffuser is often exceptionally close to your subject, the distant background receives minimal light. Even the midday sun might struggle to illuminate it significantly. The outcome resembles a studio setting, even in outdoor environments, as demonstrated in the photo below, taken on a sunny day in a backyard with only a flash as the primary light source.
Furthermore, recognizing how certain colors interact in your compositions is crucial. Reds and oranges possess a captivating allure, capturing the viewer’s attention and directing their gaze. In contrast, cooler colors such as green, blue, and purple tend to recede gracefully into the background, allowing other elements to take center stage.
In summary, while the fundamentals of composition remain constant in macro photography, its unique characteristics, such as background bokeh and the interplay of colors, present exciting opportunities to elevate your photographic creations. Embrace these distinctive aspects, and you’ll unlock the full potential of macro photography composition.
Harness Angles to Refine Your Focus: In the intricate world of macro photography, understanding the impact of camera angles can be a game-changer. Delve into this fundamental principle, where the geometry of your composition comes into play. In photography, as in geometry, any three points in space can be united by a single plane, regardless of their initial distances from the camera. The significance of this concept lies in the ability to bring three distinct elements of an image into a harmonious plane of focus.
For instance, envision a scenario where your composition involves a crab’s head and its two front claws as vital elements. The essence of this suggestion becomes apparent. By skillfully maneuvering your camera, you can align these three components within the same plane of focus, resulting in a captivating photograph where every essential detail stands crisply defined.
The Splendor of Color in Macro Photography: Macro photography introduces a vivid palette of colors, demanding a heightened awareness of their significance. While shooting in RAW format remains a universal best practice in photography, it holds particular importance in the realm of macro photography, where colors boast unrivaled prominence.
The striking intensity of colors in macro photography can be attributed to the minimal atmospheric interference between your lens and the subject during close-up shots. Consequently, if your environment is characterized by haze or fog, your macro images will radiate with more vibrant and captivating colors than any other genre of photography.
Moreover, as you delve deeper into the intricacies of macro photography, you’ll uncover minuscule, hidden color details that often elude the naked eye. For instance, consider the astonishing revelation that certain fly species possess compound eyes resplendent with a rainbow of colors. While these details remain concealed in ordinary circumstances, a macro lens operating at 1:1 magnification unveils this breathtaking kaleidoscope. Indeed, it is the allure of colors that lends macro photography its captivating charm.
Approaching Your Close-Up Subjects
Macro photography presents a unique set of challenges when it comes to engaging with your subjects, particularly due to the skittish nature of many tiny creatures. Each type of subject requires a tailored approach to maximize your chances of capturing compelling images.
Dragonflies and Damselflies
These agile insects tend to take flight when approached directly or when they sense motion toward or away from them. A strategic approach involves slow and deliberate movements while gently swaying from side to side. By taking measured, small steps forward interspersed with brief pauses, you allow the dragonfly to acclimate to your presence, often resulting in the opportunity to capture stunning close-ups.
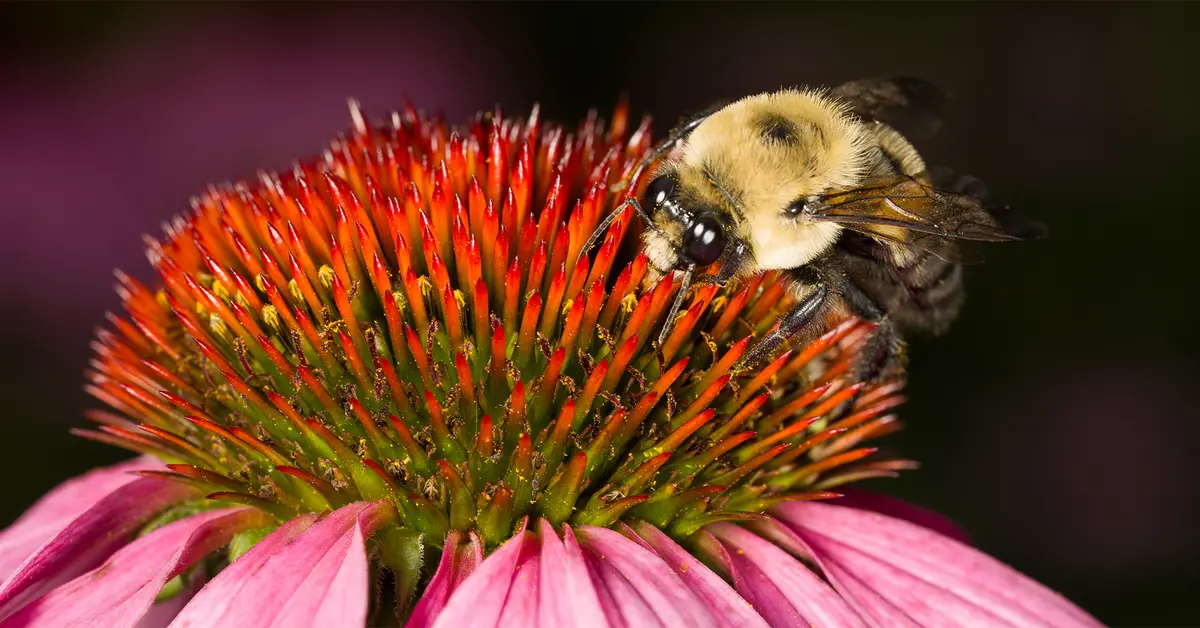
Bees: Bees are typically focused on their nectar-gathering mission and are less prone to flight when approached. While it’s essential to avoid sudden, startling movements, you need not move with exaggerated slowness. To secure an excellent bee shot, pre-focus on a specific point of a flower and patiently await a nearby bee’s arrival.
Flies: Flies exhibit more skittish behavior, but their response to slow movements is minimal. Approach them steadily, avoiding sudden gestures, and adjust your camera settings with a calm, deliberate demeanor. While flies may not remain stationary for long, their response to measured approaches is generally cooperative.
Non-flying Bugs: Ladybugs, grasshoppers, and some ants may have the ability to fly but tend to be less startled by human presence. However, their rapid movements can pose a focusing challenge. Exercise patience and precision while photographing these creatures.
Butterflies: Butterflies are sensitive to close-range movement but offer excellent opportunities for more distant shots due to their size. If you encounter a stationary butterfly, seize the chance for a beautiful close-up.
Spiders: Spiders are a macro photographer’s ideal subjects, often remaining immobile for extended periods. They are typically large enough to facilitate easy focusing and offer opportunities for captivating shots, especially when backlit by sunlight.
Tiny Bugs: When dealing with minuscule insects, it’s essential to prevent your shadow from casting over them. By positioning yourself between the subject and the sun, you reduce the likelihood of startling these tiny creatures. However, it’s worth noting that the smallest bugs may react to your camera’s flash, jumping unpredictably and challenging your timing and patience.
Macro photography is a captivating realm that rewards patience, precision, and a keen understanding of composition, colors, and subject interaction. Tailoring your approach to the specific behavior of your subjects will greatly enhance your ability to capture stunning close-up images. Embrace the charm of macro photography and the mesmerizing world of small wonders awaits your lens.
A Humble Plea for Ethical Macro Photography
Here, at Photography Life, we extend a heartfelt request to all macro photographers to practice ethical principles in their pursuit of capturing the miniature wonders of the natural world. It has come to our attention that an unfortunate trend has emerged in macro photography, where some individuals resort to harming their tiny subjects for the sake of achieving visually striking but unethical images. This practice entails placing these delicate creatures into a freezer overnight and subsequently arranging elaborate studio setups, complete with artificial elements like mushrooms, simulated rain from water bottles, and meticulously crafted pools of water, all in the quest for otherworldly shots.
Regrettably, the resulting macro photographs, while visually captivating, are often characterized by clichés, predictability, and an ethical void. Such practices tarnish the reputation of macro photography as a whole and, more importantly, pose a threat to the well-being of the critters we aim to capture. It’s crucial to acknowledge that photographers who engage in these practices frequently face public scrutiny, accompanied by a barrage of negative articles that can detrimentally impact their professional standing.
For those who are captivated by the enchanting realm of macro photography and the fascinating habits of small insects and creatures, we implore you not to become complicit in these unethical practices. The world of macro photography offers abundant opportunities for awe-inspiring and ethically sound images that celebrate the beauty of nature without causing harm.
Summary and Concluding Macro Photography Insights
We trust that this tutorial has equipped you with the knowledge and insights needed to embark on your journey toward capturing breathtaking macro photographs. While the technical aspects of macro photography hold significance, it is the practical considerations of composition and subject selection, akin to other photography genres, that truly bring your images to life. Notably, within the realm of macro photography, remarkable subjects are often found right within your reach, perhaps no further than your own backyard. Embrace the call of adventure, even amidst dirt and mosquitoes, and you will unearth hidden treasures aplenty.
In conclusion, here are some parting macro photography tips and creative ideas to set you on your path:
1. Expand Your Horizons: Look beyond bugs and plants for intriguing macro subjects. Consider exploring the macro potential of everyday objects, from pencils to droplets of water. You may stumble upon extraordinary beauty in the mundane.
2. Waterside Wonders: Bodies of water, such as ponds and streams, are rich havens for macro subjects. These environments offer a wealth of opportunities to capture unique moments, as even insects need hydration. When in doubt about your next macro venture, head towards a nearby water source.
3. Seasonal Sensibility: Macro photography is a pursuit that gracefully adapts to the seasons. While winter may bring fewer insects, it unveils a mesmerizing world of ice and snowflake photography, presenting fresh creative avenues based on your geographic location.
4. Embrace the Dawn: Start your macro photography early in the day, at the break of dawn. At sunrise, you’ll often encounter insects adorned with glistening dewdrops, patiently awaiting the warming rays of the sun. This enchanting moment is a prime opportunity for captivating macro shots.
5. Dress Smart: When photographing small creatures, it’s wise to prepare for potential insect encounters. Donning long sleeves, closed shoes, and a head net in challenging conditions can shield you from mosquitoes and other biting insects. Additionally, consider wearing gloves, even in warm weather, when navigating mosquito territory. Avoiding bug spray is recommended to prevent scaring away your subjects.
6. Illuminate with Precision: Lighting is an essential component of macro photography, and not all flash photography yields equally impressive results. Dedicate time to refine your lighting setup to achieve a natural, pleasing illumination that enhances the authenticity of your images.
7. Relish the Journey: Most importantly, revel in your macro photography experience. While it may be easy to become disheartened initially, remember that even under the most favorable conditions, macro photography often yields a keeper rate of less than 50%. Success in this genre is marked by securing just a few sharp, compelling images. Through persistent practice and exploration, your skills will flourish, and the rewards of this delightful photographic pursuit will become ever more apparent.